Cooling Misting Ring Kit Instructions and Troubleshooting
This page includes installation, operation and care instructions and a short reference video for the Ventry® Misting Ring Kit. Feel free to also download these instructions (PDF).
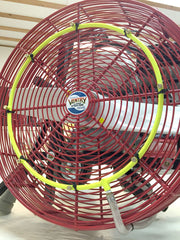
A) Mist Kit installed on a 20-inch Ventry Fan
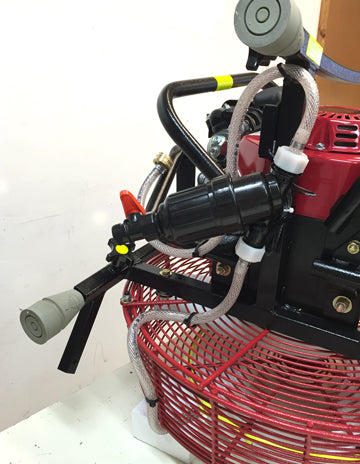
B) Filter arrow indicates direction the water flows
- How to Install the Misting Ring
- Watch a Video Showing How a Misting Ring is Installed
- Operating Instructions
- How to Flush a Blocked Filter
- How to Clean Plugged Nozzles
- Need additional help?
How to Install the Misting Ring
- Position the Misting Ring on the front of the guard as shown in picture (A). Note the placement of the supply line at a 45 degree angle to the guard—not at the center of the bottom of the guard where it would be frequently hit during fan transport.
-
Fasten the misting ring to the guard using the short wire ties included in the kit. With the wire ties, try to secure the ring to the heaviest (1/4-inch thick), straight wires of the guard, not just the thin coiled wires.
-
Install the filter so that the black arrow on the body of the filter goes in the same direction as the water flow. See photo (B) for the arrow’s location.
-
Attach the filter to the bottom of your Ventry® Fan using the large wire ties included in the kit and as shown in photo (C). Note that positioning is different depending on whether you have a 20- or 24-inch fan. For 24-inch fan positioning, please see the PDF.
-
Route the clear hose as shown and fasten it in place using the remaining wire ties.
C) Bottom view of routing on 20-inch fan
Video
Here is a brief video to supplement the instructions and photos. It shows the Misting Ring installed on a 20-inch Ventry Fan and how to access the filter.
Operating Instructions
- Once the Misting Ring is installed, connect a water supply to the inlet.
- Position and start the fan.
- Turn on the water supply. With the fan running and the water supply flowing, mist will be created.
The Misting Ring Kit comes ready to connect to a standard garden hose fitting but, with the proper adaptors, can be connected to any water supply that provides up to a maximum of 150 psi pressure.
How to Flush the Filter
During operation, if the mist appears to decrease in amount, the filter may be blocked. Flush it by turning the orange valve on the black filter so that it’s parallel to the filter body. The pressure of the water supply will flush the filter clean.
Periodically, the filter should also be rinsed clean with water. To access it, unscrew the body of the filter and pull it out.
How to Clean the Nozzles
- Remove the nozzles from the Misting Ring by turning them counter-clockwise.
- Remove the nozzles and soak in vinegar overnight.
- Rinse the nozzles and reinstall on the ring by turning clock-wise.
More help
Please call 888-257-8967 with any questions or for help.
Share this post
Latest News & Articles
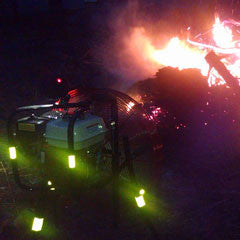
Brush Burning Fans
Several of the unique qualities which make Ventry Fans ideal for fire fighting also make them a great investment for brush/slash burning. Contractors often want 4 or more brush burner fans for huge land clearing projects; they soon realize only one Ventry Fan is needed!
Photos compare lighting options for Linemen
Photos by local linemen: They tested safety lighting solutions during overhead pole work and trench work. Photos compare headlights, spotlight, and Lentry® Portable Lighting.

Lentry Lights make quick work of nighttime repairs
See how Lentry Light Systems with a single LED light head help utility companies see and be safer when having to work at night.

Stay in touch
CALL US
We’d love to hear from you and will be happy to answer your questions and assist you with our products. Call (888) 257-8967.
E-NEWSLETTER
Sign up here for our once-a-month email of GREAT NEWS!